

Key Takeaways
Why Product Order Matters
Skincare layering isn't about ritual — it's about physics and chemistry. Skin can only absorb so much at once, and a thick cream applied before a lightweight serum will act as a physical barrier, preventing the serum from reaching skin cells where it's meant to work. Product order also affects pH: some actives, like AHA and BHA exfoliants, need an acidic environment to function, and applying a higher-pH product immediately after can neutralize that effect before it takes hold.
The foundational rule is straightforward: apply thinnest to thickest, water-based before oil-based. Beyond that, a few ingredient-specific timing considerations — covered in the steps below — make a meaningful difference in how well your routine performs.
If you're still learning what's in your products, our guide to reading skincare ingredient labels can help you decode what you're working with before layering.
What you will need
What You'll Need
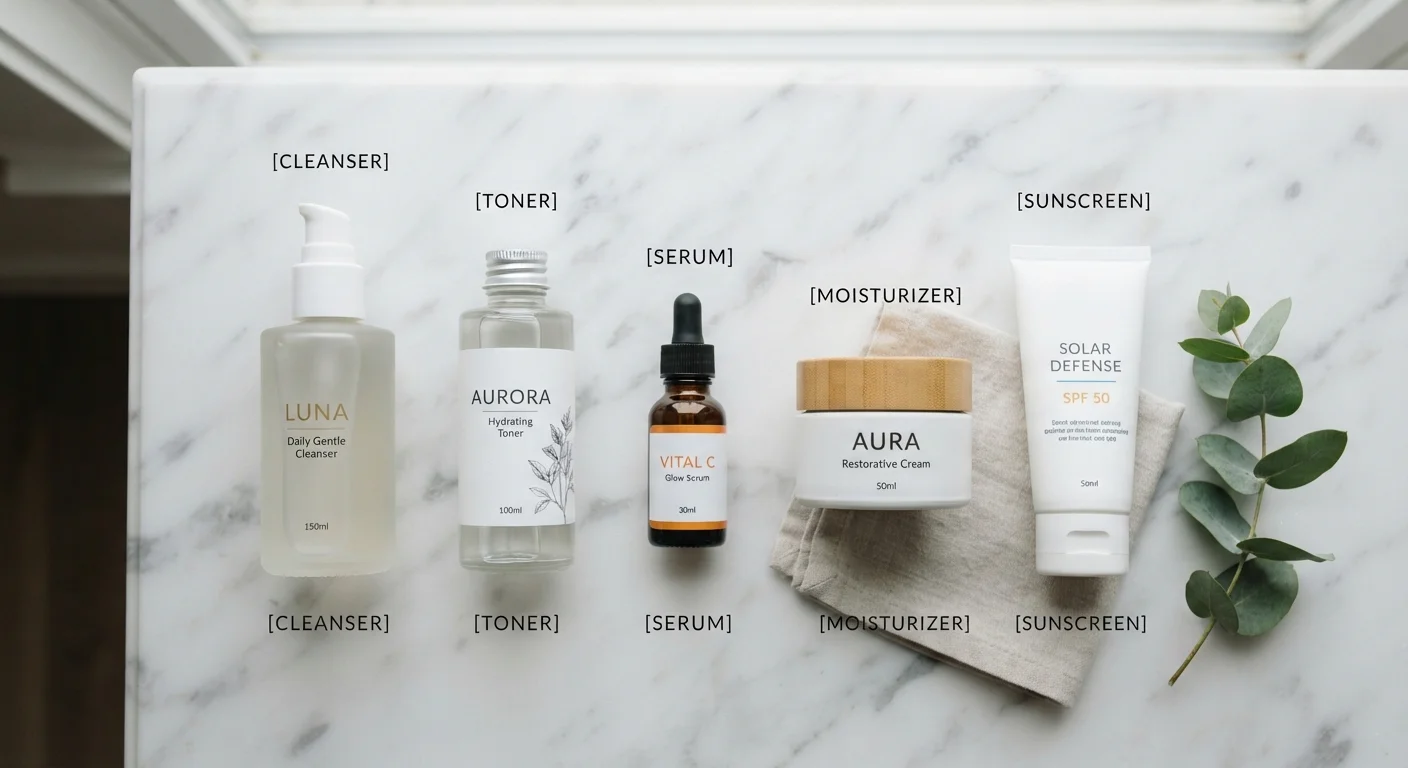
The exact products in your routine will vary depending on your skin type and concerns, but most layering sequences include some combination of the categories below. You don't need all of them — a simple routine with a cleanser, moisturizer, and sunscreen is entirely valid.
Cleanser
Removes surface debris and excess oil to prepare skin for better product absorption.
Toner or essence
Delivers lightweight hydration or pH preparation before serums are applied.
Targeted serum or treatment
Delivers concentrated active ingredients (e.g. vitamin C, niacinamide, hyaluronic acid) to address specific concerns.
Moisturizer
Seals in hydration and supports the skin barrier after lighter layers have absorbed.
Facial oil
Applied after moisturizer (if used) to add additional occlusion and nourishment.
Broad-spectrum sunscreen (SPF 30+)
Protects against UV damage; always the final morning step.
How to Layer: Step-by-Step
Follow this sequence each time you apply your routine. Morning and evening routines follow the same general logic, with the exception that sunscreen is a morning-only step and heavier treatments like retinoids are typically reserved for evenings.
Cleanse your skin
Start every routine — morning or evening — with a clean base. A gentle cleanser removes surface oil, sweat, and product residue that would otherwise sit between your skin and the active ingredients you're about to apply. Pat dry with a clean towel rather than rubbing, which can cause unnecessary friction.
Apply toner or essence (if using)
Toners and essences are among the lightest products in most routines and go on immediately after cleansing. They can help balance skin's pH after cleansing, deliver initial hydration, or prep the surface for serums. Apply by patting gently onto skin — do not rub.
Layer serums thinnest to thickest
Serums are where most active ingredients are concentrated. The general principle: apply the most water-like serums first and progress toward thicker, more viscous formulas. If you use a watery vitamin C serum and a thicker peptide serum, the vitamin C goes on first. This order allows each product to contact skin directly rather than being blocked by a heavier layer.
If you're new to building a routine, start with one serum and expand from there.
Apply spot treatments
Targeted treatments — such as those for blemishes or hyperpigmentation — are generally applied after serums but before your moisturizer. Applying them earlier ensures they're in direct contact with skin rather than sitting on top of other products, which can reduce their efficacy.
Moisturize to seal and support the barrier
A moisturizer — whether gel, lotion, or cream — helps lock in the layers applied before it and supports the skin barrier. Heavier creams and occlusives go here, after all lightweight treatments have been absorbed. If you use a facial oil, it typically comes after your moisturizer, not before, since oils can prevent water-based products from penetrating.
For those managing concerns like visible aging, understanding the principles behind an effective anti-aging approach can help you select the right moisturizer type for your routine goals.
Finish with sunscreen (morning only)
In the morning, sunscreen is the non-negotiable final step. Broad-spectrum SPF protects against both UVA and UVB rays, and its effectiveness depends on forming an uninterrupted film on the surface of skin. Nothing should go on top of it except makeup, if you wear it. Reapply throughout the day as needed.
Give Each Layer a Moment to Set
You don't need to time every step with a stopwatch, but a brief pause — around 30 to 60 seconds — between products helps each layer begin absorbing before the next is applied. This is especially useful with water-based serums and toners, which can pill or bead up if you apply the next product too quickly.
Sunscreen Must Always Go Last
In a morning routine, sunscreen should be the final product you apply before makeup or going outside. Layering anything on top of sunscreen — including moisturizer — can physically disrupt the UV-filter film and reduce its effectiveness. If you use a separate moisturizer, apply it first and give it a moment to absorb before applying SPF.
Once you've established a consistent layering routine, consider auditing your routine for gaps to identify anything that may be missing or mismatched.
Don't Layer Incompatible Actives in the Same Step
Certain ingredient combinations — such as retinol with AHA/BHA acids, or vitamin C with niacinamide at high concentrations — are better separated into different routines or steps to minimize potential irritation. Before adding a new active to your routine, check whether it pairs well with what you're already using. See our guide to tricky ingredient pairings for specifics.
This article is for general informational purposes only and does not constitute medical or dermatological advice. Consult a qualified dermatologist if you have persistent skin concerns or reactions.